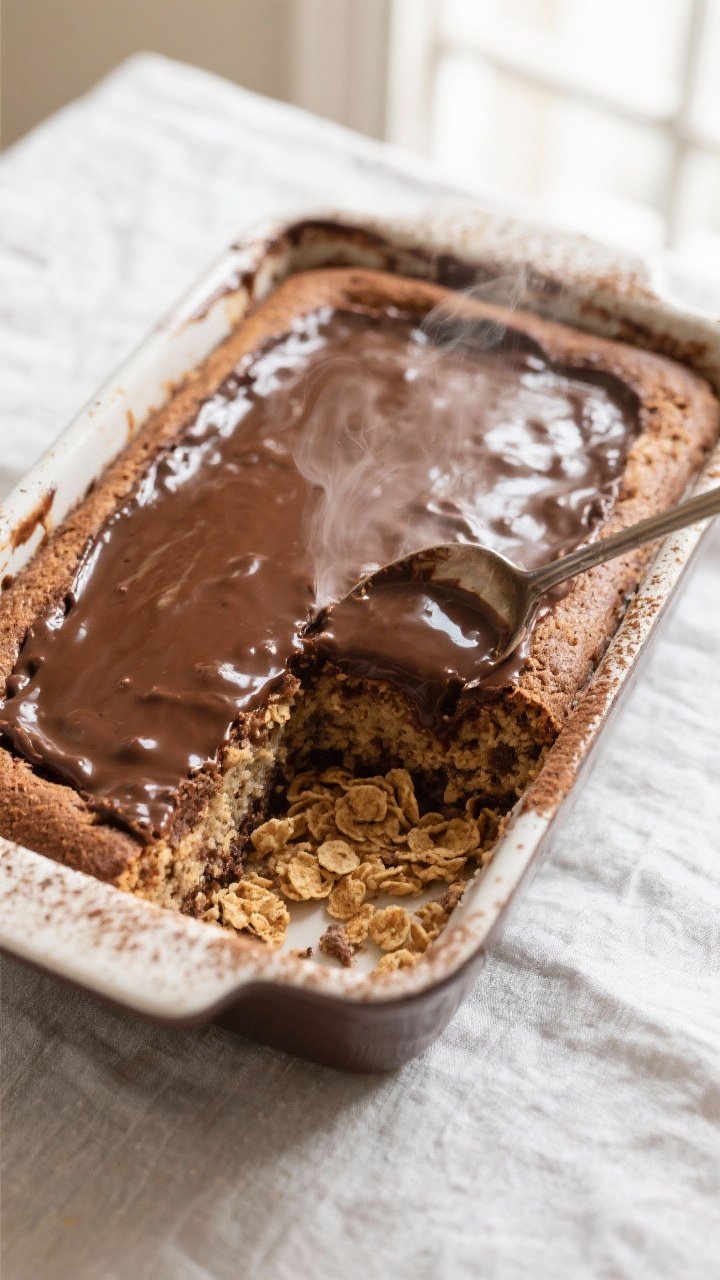
How to Create a Delicious Chocolate Yule Log Cake at Home
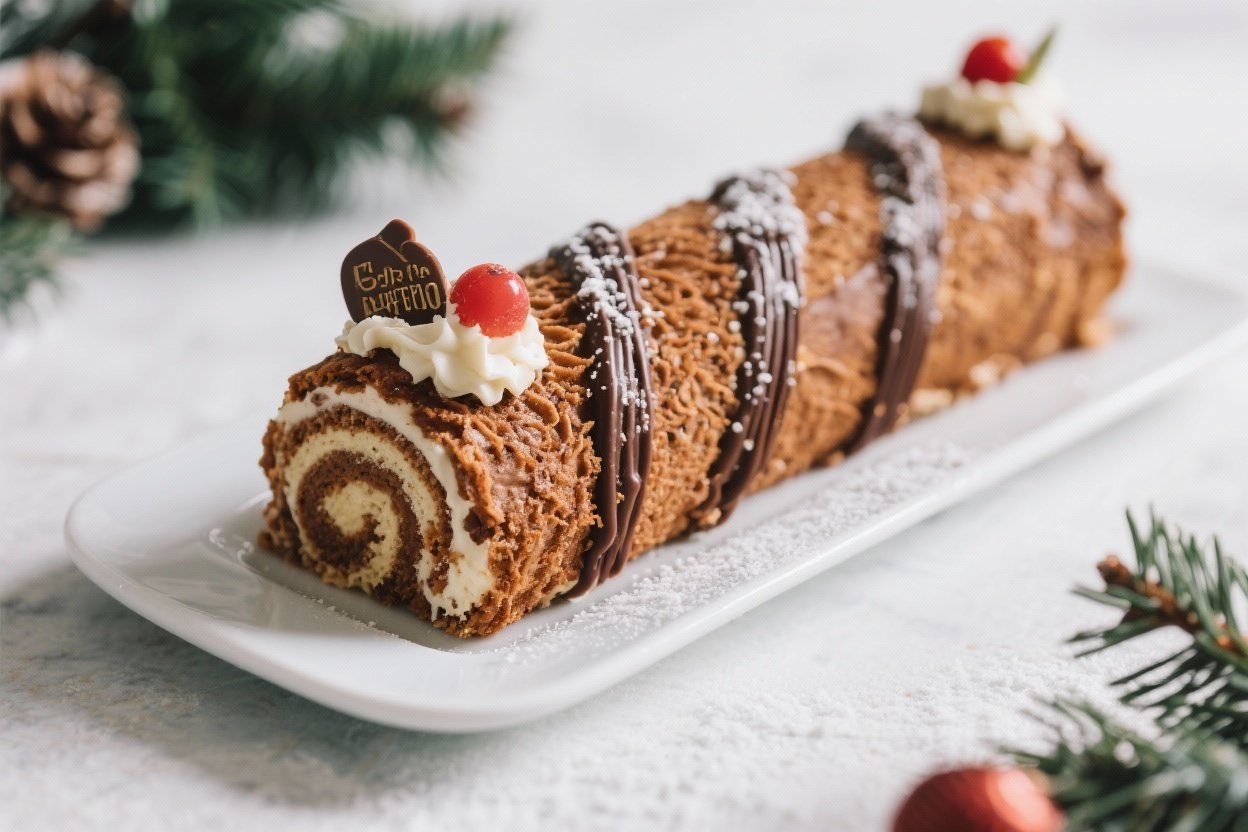
A Yule log cake looks impressive, tastes like a dream, and brings instant holiday cheer to the table. It’s a light chocolate sponge rolled with whipped cream and covered in silky ganache, then decorated to resemble a rustic log. The best part?
It’s more approachable than it appears. With a few smart techniques, you’ll get a soft, flexible cake that rolls without cracking and a finish that feels special. This is the kind of dessert that makes everyone pause, smile, and ask for seconds.
Why This Recipe Works
- Flexible sponge: A low-fat, egg-forward batter bakes up airy and pliable, which helps prevent cracks when rolling.
- Quick roll-and-cool method: Rolling the cake in parchment while warm “teaches” it the shape, so it holds together once filled.
- Stabilized whipped cream: A touch of mascarpone or cream cheese helps the filling stay fluffy and slice neatly.
- Glossy ganache: The chocolate ganache spreads smoothly and sets with a soft sheen, perfect for bark-like texture.
- Make-ahead friendly: You can bake, fill, and chill the cake a day ahead, then frost and decorate before serving.
What You’ll Need
- For the chocolate sponge:
- 4 large eggs, at room temperature
- 3/4 cup granulated sugar
- 1 teaspoon vanilla extract
- 1/4 cup whole milk, at room temperature
- 1/4 cup neutral oil (such as canola)
- 3/4 cup all-purpose flour
- 1/4 cup unsweetened cocoa powder
- 1 teaspoon baking powder
- 1/4 teaspoon fine salt
- Confectioners’ sugar for dusting
- For the whipped cream filling:
- 1 cup heavy cream, cold
- 3 tablespoons confectioners’ sugar
- 1 teaspoon vanilla extract
- 2 tablespoons mascarpone or softened cream cheese (optional, for stability)
- For the chocolate ganache:
- 1 cup semi-sweet chocolate chips or chopped chocolate
- 3/4 cup heavy cream
- Pinch of salt
- 1 teaspoon butter (optional, for extra shine)
- For decoration (optional):
- Fresh cranberries, rosemary sprigs, or powdered sugar “snow”
- Chocolate curls or cocoa nibs
- Equipment:
- 10×15-inch jelly roll pan
- Parchment paper
- Clean kitchen towel
- Electric mixer
- Offset spatula
Step-by-Step Instructions
- Prep the pan and oven: Heat the oven to 350°F (175°C).
Line your jelly roll pan with parchment, leaving overhang for easy lifting. Lightly grease the parchment.
- Whip the eggs and sugar: In a large bowl, beat the eggs, sugar, and vanilla on high until thick, pale, and tripled in volume, about 5 minutes. This step gives the cake its lift.
- Combine liquids: In a small bowl, whisk milk and oil until smooth.
Set aside.
- Sift dry ingredients: Sift flour, cocoa, baking powder, and salt together. Sifting removes lumps and keeps the sponge light.
- Fold the batter: Gently fold the dry ingredients into the egg mixture in two additions. Drizzle in the milk-oil mixture and fold just until combined.
Do not overmix.
- Bake: Spread the batter evenly in the pan. Bake 10–12 minutes, until the top springs back and a toothpick comes out clean. Do not overbake or the cake will crack.
- Roll while warm: Dust a clean towel with confectioners’ sugar.
Lift the hot cake using the parchment, invert onto the towel, and peel off the parchment. Starting from a short end, roll the cake and towel together. Let cool completely, seam-side down.
- Make the filling: Beat heavy cream, confectioners’ sugar, and vanilla to soft peaks.
Add mascarpone if using and beat to medium peaks. Keep it soft and spreadable.
- Unroll and fill: Carefully unroll the cooled cake. Spread the whipped cream in an even layer, leaving a 1/2-inch border.
Roll the cake back up (without the towel) and place seam-side down on a board. Chill 20–30 minutes.
- Make the ganache: Heat cream just to a simmer. Pour over chocolate with a pinch of salt.
Let sit 2 minutes, then stir until smooth. Add butter if using. Cool until thick enough to spread but still glossy.
- Frost and texture: Spread ganache over the cake.
Use a fork or spatula to create bark-like ridges. For a classic look, slice a short diagonal piece off one end and attach it to the side as a “branch,” then frost over the seam.
- Decorate and chill: Dust with confectioners’ sugar, add cranberries and rosemary, or sprinkle chocolate curls. Chill at least 30 minutes to set before slicing.
Keeping It Fresh
- Refrigeration: Store the cake covered in the fridge for up to 2 days.
The whipped cream stays stable and the ganache keeps it moist.
- Make-ahead: Bake and roll the sponge (with no filling) a day ahead. Keep wrapped at room temperature. Fill and frost the day of serving.
- Freezing: Freeze the rolled, unfrosted cake (with or without filling) tightly wrapped for up to 1 month.
Thaw overnight in the fridge, then add ganache and decorations.
- Serving temp: For best flavor, let the cake sit at room temperature for 20–30 minutes before serving.
Why This is Good for You
- Portion-friendly indulgence: The cake is light, so a modest slice satisfies without feeling heavy.
- Less butter than layer cakes: The sponge relies on whipped eggs, not lots of fat, for structure and softness.
- Cocoa benefits: Cocoa brings antioxidants and deep chocolate flavor, so a little goes a long way.
- Customizable sweetness: You can choose darker chocolate and adjust sugar to suit your taste.
Pitfalls to Watch Out For
- Overbaking the sponge: Even a minute too long dries it out and causes cracks. Pull it as soon as it springs back.
- Skipping the warm roll: If you don’t roll it while warm, it won’t “learn” the shape and may split when filled.
- Overwhipped cream: Grainy, stiff cream tears the sponge when spreading. Stop at medium peaks.
- Ganache too hot: Warm ganache will melt the filling.
Let it thicken to a spreadable, cool state.
- Thick filling layer: Too much filling makes the roll slip or burst. Keep it even and modest.
Recipe Variations
- Mocha log: Add 1 teaspoon instant espresso to the sponge and 1 teaspoon to the ganache for a coffee-kissed finish.
- Peppermint twist: Stir 1/2 teaspoon peppermint extract into the whipped cream and garnish with crushed candy canes.
- Hazelnut dream: Spread a thin layer of chocolate-hazelnut spread under the cream and top with chopped toasted hazelnuts.
- Raspberry version: Add a swipe of seedless raspberry jam before the cream and garnish with fresh berries.
- Gluten-free: Use a 1:1 gluten-free baking blend and sift well. Bake and handle gently; GF sponges can be more delicate.
- Dairy-free: Use coconut cream for the filling and a dairy-free chocolate with coconut milk for ganache.
FAQ
How do I prevent the cake from cracking?
Rolling the cake while it’s still warm is the key.
Don’t overbake, and dust the towel generously with powdered sugar so it doesn’t stick.
Can I use buttercream instead of whipped cream?
Yes. A light buttercream works well and is more stable if the cake will sit out longer. Spread a thin layer to keep the roll tight.
My ganache is runny.
What can I do?
Let it cool longer, stirring occasionally. If it’s still loose, whisk in a few tablespoons of additional melted chocolate and chill briefly until thickened.
Do I need a jelly roll pan?
A 10×15-inch jelly roll pan gives the right thickness. A 9×13 works in a pinch, but the cake will be thicker and may need an extra minute of baking.
How far in advance can I make it?
Assemble up to 24 hours ahead and keep refrigerated.
For longer lead time, freeze the rolled cake (unfrosted), then thaw, frost, and decorate the day of.
What chocolate is best for ganache?
Use good-quality semi-sweet or dark chocolate (55–65% cacao). It melts smoothly and balances the sweetness of the filling and sponge.
Can I add liqueur?
Yes. Brush the unrolled sponge lightly with coffee liqueur, rum, or orange liqueur before adding the filling.
Use just enough to scent, not soak.
In Conclusion
A Yule log cake brings classic holiday charm without demanding pastry-chef skills. With a tender sponge, cloud-like filling, and a glossy chocolate finish, it’s festive and approachable. Follow the warm-roll method, keep the cream soft, and let the ganache cool before spreading.
Dress it up with simple decorations, slice, and enjoy the oohs and ahhs around the table. This is a tradition worth keeping.
Printable Recipe Card
Want just the essential recipe details without scrolling through the article? Get our printable recipe card with just the ingredients and instructions.