Peppermint Bark: The Ultimate Festive Chocolate Treat for Christmas
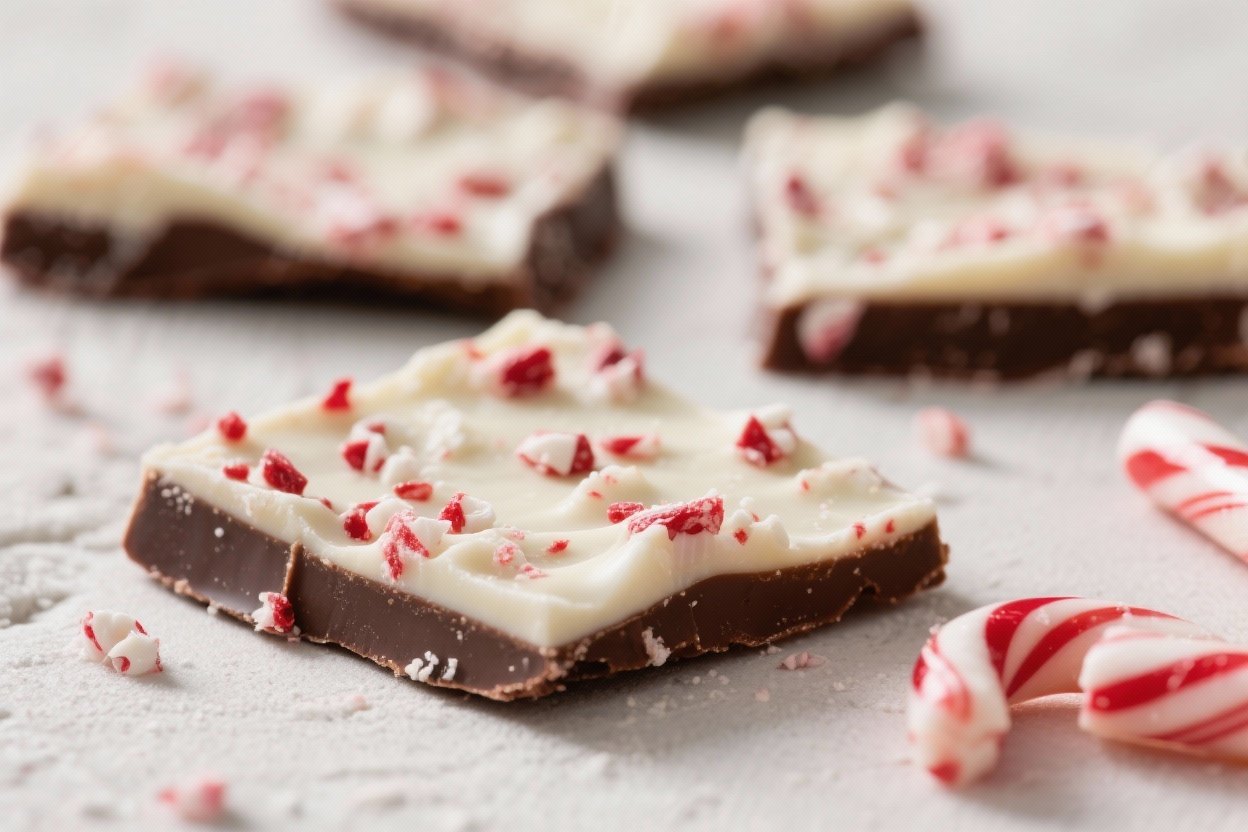
Peppermint bark is one of those holiday classics that never goes out of style. It’s crunchy, minty, and layered with rich chocolate—simple enough to make with kids, yet elegant enough to gift. You don’t need special equipment, fancy skills, or much time.
Just a few ingredients and a baking sheet, and you’re set. Whether you prefer it thin and snappy or thick and indulgent, this version is easy to tweak to your taste.
What Makes This Recipe So Good
- Two kinds of chocolate for balanced flavor: deep, rich dark chocolate and creamy white chocolate.
- Real peppermint from crushed candy canes plus a touch of peppermint extract for a clean, cool finish.
- No tempering required when you use good-quality baking chips or melting wafers, so it’s approachable for beginners.
- Quick to make—about 20 minutes of hands-on time, then it chills in the fridge.
- Perfect for gifting: it breaks into beautiful shards and stores well.
What You’ll Need
- Dark or semisweet chocolate (10–12 ounces), chopped or chips
- White chocolate (10–12 ounces), chopped or chips
- Peppermint extract (about 1/2 teaspoon total)
- Candy canes or hard peppermint candies (4–6 regular canes), crushed
- Neutral oil or cocoa butter (optional, 1–2 teaspoons) to help with melting
- Fine sea salt (a pinch, optional) to balance sweetness
- Equipment: Baking sheet, parchment paper, microwave-safe bowls or a double boiler, spatula, zip-top bag and rolling pin (for crushing candy)
Step-by-Step Instructions
- Prep your pan. Line a baking sheet with parchment paper. For thinner bark, use a larger sheet; for thicker bark, use a smaller one.
- Crush the candy canes. Place candy canes in a zip-top bag and crush into small pieces with a rolling pin.
Aim for a mix of small bits and some dust. Set aside.
- Melt the dark chocolate. Microwave in 20–30 second bursts, stirring between each, until smooth. Add 1/4 teaspoon peppermint extract and a pinch of salt if desired.
Stir well. If you prefer, melt using a double boiler.
- Spread the base layer. Pour the dark chocolate onto the parchment and spread into an even rectangle, about 1/8 to 1/4 inch thick. Tap the pan gently to level.
- Set briefly. Chill the dark chocolate in the fridge for 10 minutes, just until it begins to firm but is not rock hard.
This helps layers stick without blending.
- Melt the white chocolate. Use the same method: short bursts in the microwave, stirring often. Add 1/4 teaspoon peppermint extract. If the white chocolate is thick, stir in 1 teaspoon neutral oil to loosen.
Avoid overheating—white chocolate scorches easily.
- Add the white layer. Pour the white chocolate over the semi-set dark layer. Spread gently to the edges without dragging up the bottom layer. Work quickly so it doesn’t seize.
- Top with peppermint. Immediately sprinkle the crushed candy canes evenly over the white chocolate.
Press very lightly so the pieces adhere.
- Chill to set. Refrigerate for 20–30 minutes until completely firm. Don’t freeze, or condensation may make the candy sticky later.
- Break into pieces. Lift the bark using the parchment. Break into shards with your hands or cut with a sharp knife for cleaner edges.
- Serve or store. Enjoy right away, or keep in an airtight container as described below.
Keeping It Fresh
- Room temperature: Store in an airtight container for up to 2 weeks.
Keep away from heat and sunlight.
- Refrigerator: Lasts 3–4 weeks, sealed well. Let it sit a few minutes at room temperature before serving to take off the chill.
- Freezer: Up to 2 months. Wrap tightly in parchment and then in a freezer bag.
Thaw in the fridge to avoid condensation.
- Layer with parchment: If stacking pieces, separate layers with parchment to prevent sticking and preserve the peppermint topping.
Benefits of This Recipe
- Fast and forgiving: No complex techniques or candy thermometers needed.
- Budget-friendly gift: A small batch yields many pieces, perfect for tins and cookie boxes.
- Customizable thickness and flavor: Adjust the layers, add more or less peppermint, or mix in textures like pretzels or nuts.
- Great make-ahead treat: Holds well and tastes just as good days later.
- Gluten-free by default: Most versions are naturally gluten-free; just check your chocolate and candy labels.
Pitfalls to Watch Out For
- Overheating chocolate: Chocolate burns quickly in the microwave. Use short bursts and stir often.
- Seized white chocolate: Even a drop of water can cause clumping. Keep tools dry and avoid steam.
- Layers separating: If the bottom layer gets too hard before adding the white chocolate, the layers may split.
Add the top layer when the base is set but still slightly tacky.
- Sticky peppermint topping: Storing in a humid place or the freezer without proper wrapping can make candy sticky. Keep bark sealed and dry.
- Weak mint flavor: Relying only on candy canes can taste flat. A small amount of peppermint extract brightens the flavor.
Alternatives
- Chocolate swap: Use milk chocolate for a sweeter base or all dark for a more intense bite.
- Swirled version: Skip layering and swirl melted dark and white chocolate together before adding peppermint.
- Mix-ins: Add crushed Oreos, toasted almonds, pistachios, or pretzel bits for extra crunch.
- Flavor twists: Replace peppermint extract with orange extract and top with candied orange peel; or try a mocha spin with espresso powder in the dark chocolate.
- Dairy-free: Use dairy-free chocolate and vegan white chocolate.
Check labels to ensure they melt well.
- Sugar control: Choose no-sugar-added chocolate and sugar-free peppermint candies if needed.
FAQ
Do I need to temper the chocolate?
Tempering gives a glossy finish and clean snap, but it’s not required for peppermint bark meant to be stored in a tin or served at home. Using good-quality chips or melting wafers gives a nice result without the extra work. If you want a pro-level finish, you can temper, but it’s optional.
Why did my white chocolate clump?
It likely overheated or came into contact with moisture.
Melt it in brief intervals and stir often. If it thickens, a small amount of neutral oil or cocoa butter can help smooth it out.
How thick should the layers be?
That’s personal preference. A common approach is a slightly thicker dark layer and a thinner white layer, about 2:1.
Spread thinner for snappy bark or thicker for chunkier bites.
Can I make it without peppermint extract?
Yes. The candy canes provide mint flavor on their own. However, adding a small amount of extract gives a cleaner, more pronounced peppermint taste.
How do I get clean, straight edges?
Let the bark chill fully, then use a warm, sharp knife to cut it into squares or bars.
For a rustic look, snap it by hand into irregular shards.
What’s the best chocolate to use?
Use chocolate you enjoy eating on its own. Baking bars, high-quality chips, or melting wafers all work well. Avoid compound chocolate that tastes waxy or overly sweet.
Can I color the white chocolate?
Yes, but use oil-based candy coloring.
Water-based gels can cause seizing. A tiny drop goes a long way for a blush-pink holiday look.
Wrapping Up
Peppermint bark is simple, festive, and endlessly flexible. With two layers of chocolate and a cool peppermint crunch, it hits all the right notes for the holidays—or any time you want an easy sweet.
Keep a batch on hand for last-minute gifts, dessert trays, or just a cozy night in. Once you make it yourself, you’ll see why it’s a yearly tradition for so many.